
Modern Farmhouse Barn Door: An Easy DIY
I’ve always wanted a barn door. They are an eye catching design element in any room and a very practical space saver. Besides our fireplace makeover, these barn doors are my favorite transformation at PINEdaisyHOUSE.

Our basement walls are planked in a cognac type brown tone that, depending on the light, can be just the right kind of warm and rustic our home embodies. While I love the rustic appearance planked walls can hold, I’m not a fan when they’re paired with dingy brown walls and parquet flooring. My ideas for the basement have been much like the fireplace, they’ve changed with time from white washing the planked walls to embracing the wood’s rustic charm by off setting the brown with cool grays and whites. Don’t worry, someday the floors will transform into something else. All in good time though, meanwhile, gotta work with what you have (aka buy an area rug to cover the ugly floor).
We are taking it one step at a time down there. One of the really important aspects of any living space is, at times, it’s gotta have function over form. So two doors opening into small utility rooms was not helping us use all our square footage in the basement. Enter the idea of two sliding barn doors!
After a little research I realized this is a super easy DIY project. You need an extra set (or two) of hands for one step, but otherwise, it’s a synch. Even simpler if you use your existing door.
Paint the Doors
Start by taking the door off the hinge, then paint! I painted mine a gorgeous cool gray to help balance the planked wall. The ceilings in our basement are traditional height and with a main floor of 20ft+ and beams it can seem cramped downstairs. So once the paint was just dry to the touch I used a bristle brush in a vertical motion to give them depth to the doors, and a taller appear.

The Barn Door Hardware
I seriously don’t know what I would do without Pinterest. Again it saved the day with ideas and tutorials. I bought all of the barn door hardware at Home Depot. The cost of each door’s set of hardware was around $40.00. I used black piping, plus a few other things for each door. Here is what I used.
Barn door hardware (for 1 door):
- 3 large Eyebolts- 3/8 in x 2-1/2 in
- 3 90 lb stationary casters (CRUCIAL must be stationary)
- *The doors are moving back and forth on hard floor. Since we bought stationary casters, we did not find it necessary to buy tracks for the door to move along.
- 2 floor flanges- 1/2 in
- 2 90 degree elbows- 1/2in X 1-1/2 in
- 2 Nipples- 1/2 in x 1-1/2 in
- Black Pull Plate- 3-1/2 in x 15 in (buy one or two, if you want to mount the pull plate on both sides of the door.)
- 72 in black galvanized pipe – 1/2 in (Home depot will not cut your pipe for you)
- Black wood screws
- I chose to use our existing doors so I didn’t need to buy the door.
Tools to Build The Barn Door
Tools you’ll need:
- Measuring Tape
- Electric Drill
- Step ladder
- Level
- Another person (or two) when you go to mount the door.
How to Build The Barn Door
After the barn door is painted and dry follows these easy steps.
Barn Door Step 1
- Start with the stationary casters. Measure the length of the bottom of the door. Find the exact center. Place the first caster there. Then measure either 8, 9, or 10 inches out (depending on the width of the door), on both sides of that middle caster. Screw in the remaining two casters making sure they are both the exact same distance from the middle. I drilled mine flush. Also, make sure the casters are drilled in the direction the door will roll! Write down the spacing used for the casters, it will need to match the eye bolt spacing on the top of the door exactly.
 Barn Door Step 2
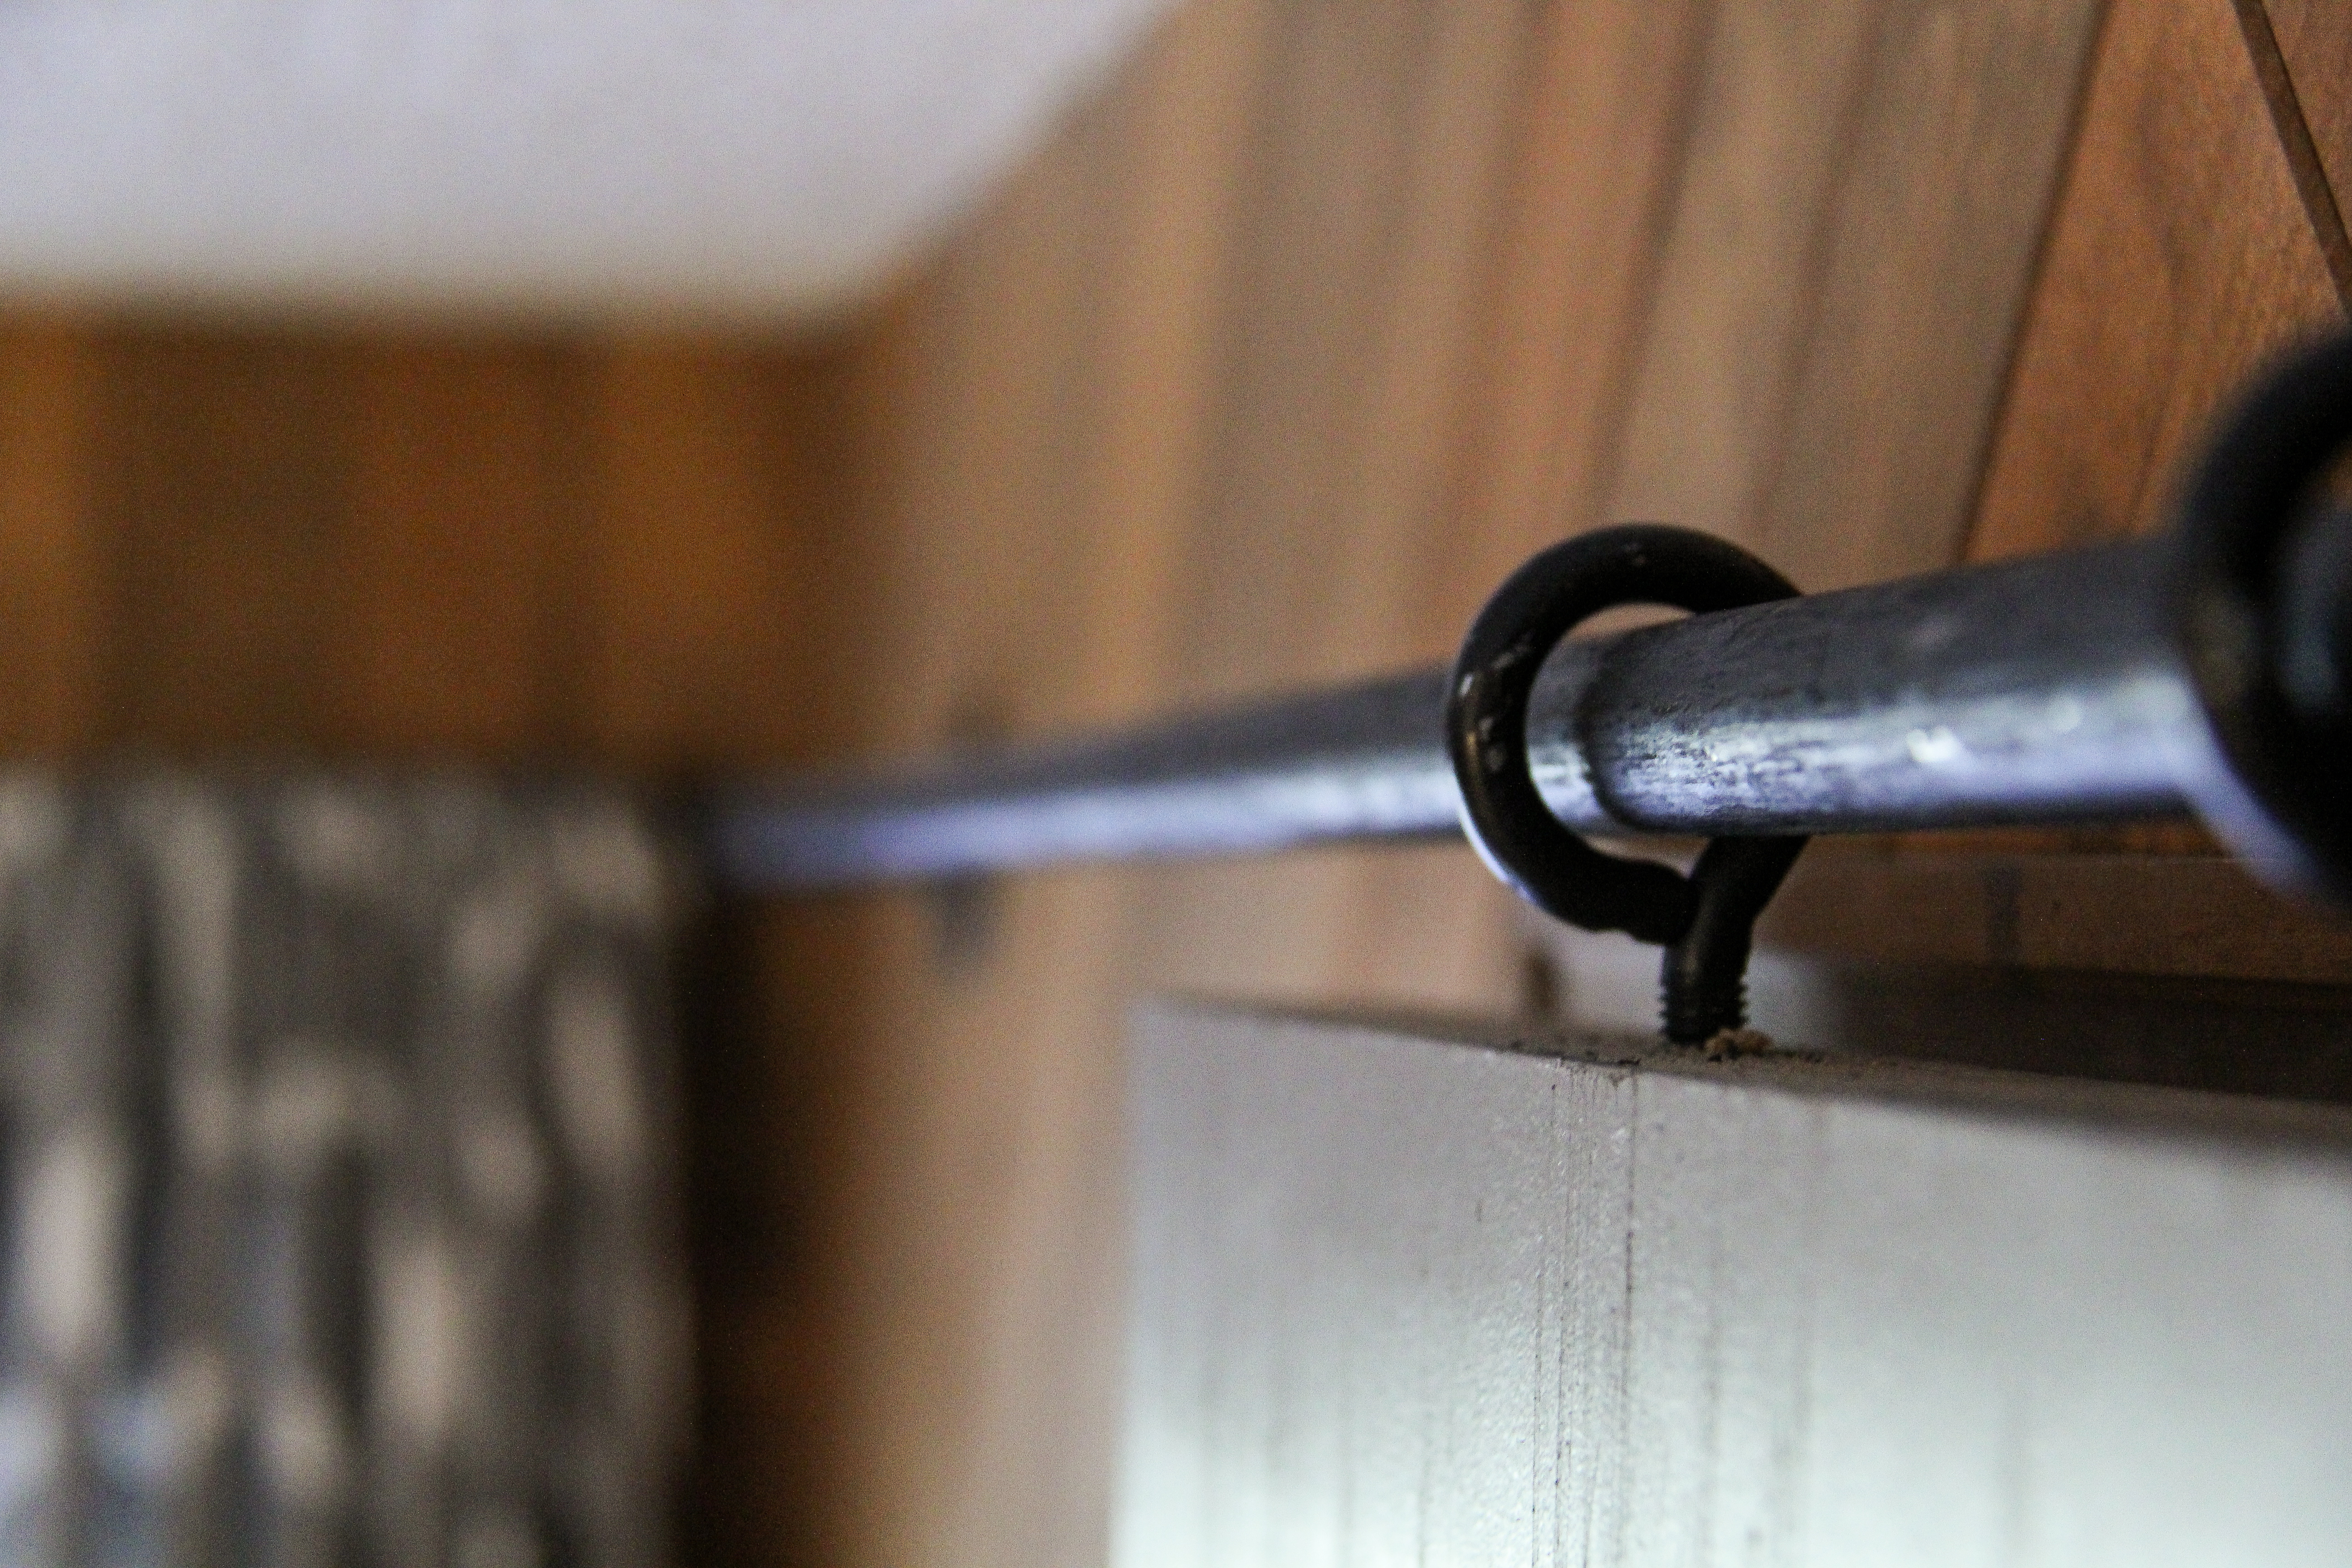
- Time to drill in the eye bolts to the top of the door. Following the same pattern as you did with the casters, drill in the eye bolts and ensure they are all perfectly aligned. You’ll start by drilling a pilot hole, so have different drill bits handy. Then once that’s complete, start to screw in your eye bolts by hand. Make sure you are screwing them straight in (not at an angle). Count your half turns for each eye bolt so that they all measure the same height from the top of the door to the top of the eye bolt when you are finished.
Barn Door Step 3
- With the help of another person, stand the door up in the doorway you wish to mount it in. Slowly thread the galvanized pipe into the eye bolts. Then screw an elbow, nipple, and floor flange to one side of the pipe. As the entire piece is standing in the doorway with its full weight on the casters, determine where to screw the floor flange into the wall by using a pencil. Hopefully you can drill into a stud otherwise you are going to need to anchor the screws into the wall. Once placement is determined securely drill in the first side of barn door hardware system.
 Barn Door Step 4
- This is the only tricky step. You want your door to travel with ease along it’s track. So the galvanized pipe needs to sit centered inside the eye bolts. Make sure the pipe doesn’t drag or rub against any of the eye bolts. Otherwise it will slow the door’s movement and make a horrible creaking sound when it’s is moved. Hopefully you evenly screwed each eye bolt in to the door. If not just tweak them until the galvanized pipe is level and flawlessly within the track. After you’ve made sure everything is level and moves with ease, secure the other side of the barn door hardware to the wall. Use the second elbow, nipple, and floor flange to do so. Disclaimer, our doors do squeak a little when they are moved, but not so much that it’s ear piercing and we think it gives them a rustic appeal.

- Now stand back and admire the results.

Simple Barn Door Project
The Barn Door project was easy, fun, economical and family friendly. So often I find myself wishing I could snap my fingers and have big design projects, like the basement, done in a flash. Purposeful design evolves over time. I have high hopes for our basement and elevating these doors to be a design focal point was a perfect first step on that journey.
If I had finished the entire basement right away, I would have spent more money and wouldn’t have fallen in love with the rustic charm of our planked walls. Living with an undecorated, unstyled space for a little while lets you listen to the needs of the room. Now we plan on continuing the rich cognac brown and gray colors throughout the basement and hope to give the entire lower level an industrial farmhouse appeal. With mountain and Colorado accents throughout of course. Slow design is one thing intentional living embodies. I love edging one step closer to a finished product downstairs with every little project we tackle.
With Intention,
Edi
PS. Questions, or thoughts? Comment below!


